Showing posts with label X-Press It Blending Card. Show all posts

Wednesday, April 15, 2015

Copic Coloured Feathers

Hi Copic fans - today I thought I'd try something fun and funky - colouring feathers with my Copic Markers!  As it turns out the most difficult thing about this was finding the white feathers - as for the colouring the feathers, it was so much easier than I thought it would be and rather a lot of fun.


Gather beautiful supplies, I used:

  • Copic Markers: RV17, V09, B16, V17, BG13, BG57 & BG75
  • Kirarina Wink Pens: Candy Set
  • Molotow One4All Paint Pen EF 2mm nib
  • X-Press It Double Sided Tape
  • FabScraps Starburst Sprays: Tea Pot Purple & Time Travel Teal
  • White Feathers
  • X-Press It Blending Card A4
  • Ink Pads: Archival Royal Purple, Aquamarine and Delicata - Golden Glitz


Begin by cutting some of the X-Press It Double Sided Tape to size and trim the ends to fit the feathers, stick a piece of tape onto the back of each feather.  This provides a little extra strength and stops the feather splitting as you work on it.


Using a variety of Copic Marker Colours, carefully colour each feather - I varied my feather colours but used the same process on each.


Begin by adding BG13 - use the Copic Marker to create a chevron pattern.  Try to work in the direction of the feather - it's much easier!


Add some V09.


Use BG57 to begin smoothing out the colours by adding this colour between and over some of the previous colouring.


Finish colouring with BG75 - you can leave some white space if you like.


Once the feathers are coloured to your satisfaction, it's time to add some metallic glitz with the fabulous Kirarina Wink pens and Molotow paint markers - I added dots, stripes and even coloured some of the tips on my feathers.


To create a background for the feathers, stamp some text on the bottom of your white cardstock - I used purple and aqua inks with a little Delicata Golden Glitz over the top. 


Add a few splashes or drips of Starburst sprays and dry with a heat gun/embossing tool.


Remove the backing from double sided adhesive tape on your feathers and press carefully and firmly onto your card front.  Your finished card should look a little something like this.


I can think of all sorts of uses for these Copic coloured feathers now that I've finished this - I think I might make myself a pair of earrings next!

Back soon with more,
Kate

Pin It

Wednesday, March 18, 2015

Mail Art Made Easy with Copics

Hello gorgeous Copic Oz fans, today I'm going to show you how to create a beautiful piece of mail art that's almost too pretty to send!  This is a great way to create custom envelopes and really impress your postie, plus it's a simple way to reuse some of your own art to make something new.  If you don't want to make your own, there are an amazing array of beautiful stencils and masks on the market these days and this technique is versatile enough to look amazing with most of them.


You Will Need:

  • Copic markers:  Y06, BV11, B02, BG05 & RV06
  • Copic Various Ink: Colorless Blender
  • Copic Multi Liners: 0.3 & 0.5
  • AtYou Spica: Turquoise, Clear and Pink
  • Fab Scraps Stencil: Stars
  • X-Press It: Blending Card and Mask It film
  • Mini Mister bottle filled with Colorless Blender
  • Black acrylic paint or gesso


Instructions

You can watch this being created on our YouTube channel or follow the instructions below.


Step 1: Gather some bright colour Copic markers, your favourite paper and Mask It film.
Fold card to create envelope.


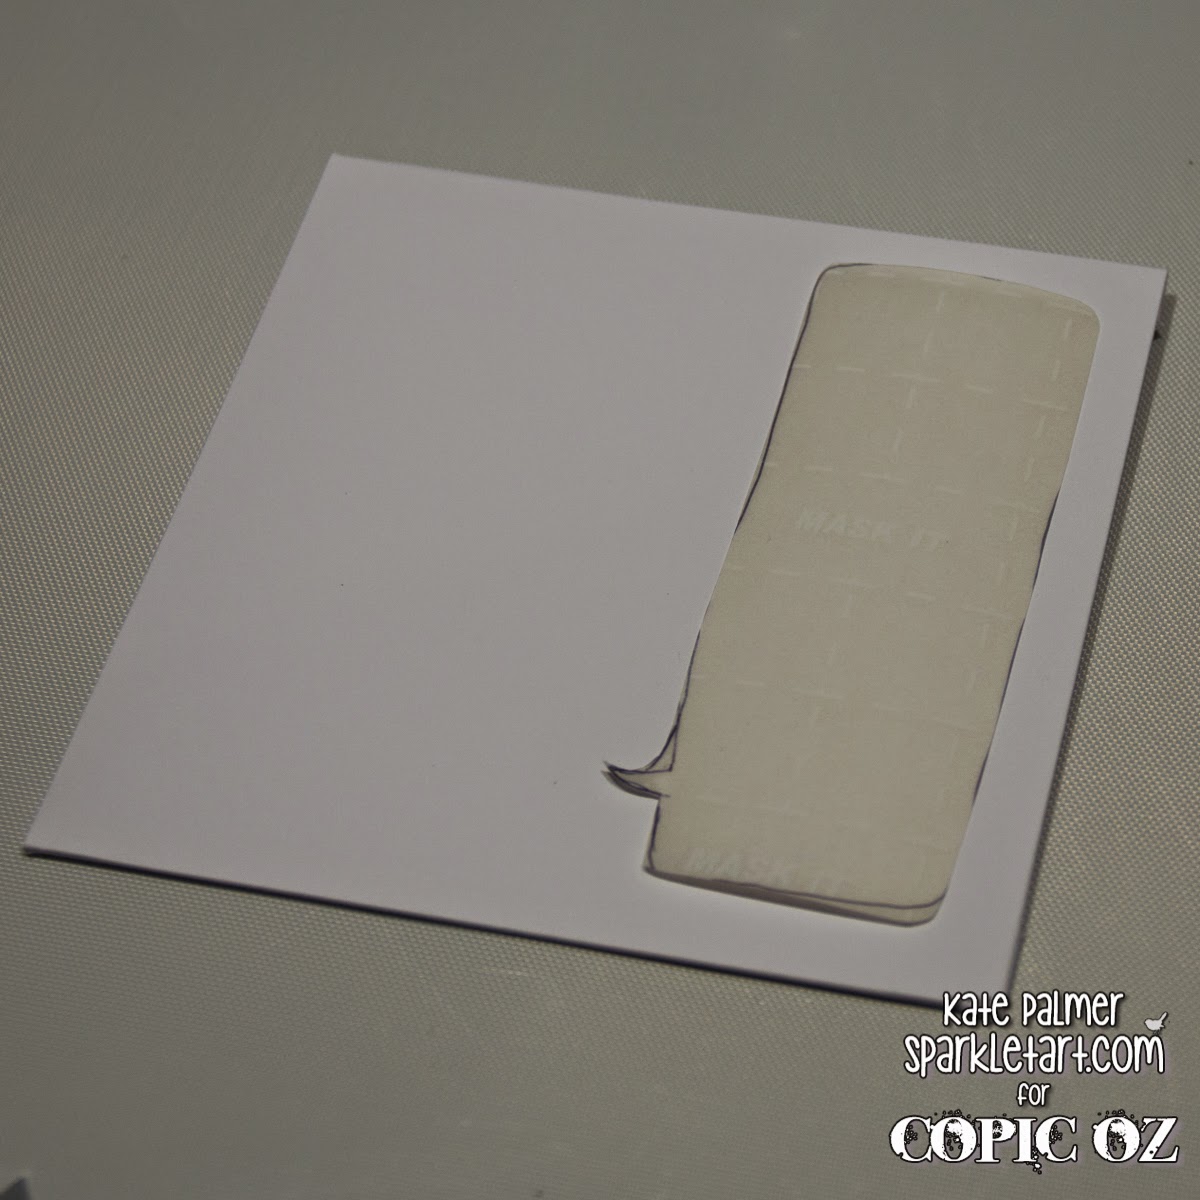
Step 2: Cut a speech bubble shape out of Mask It film and adhere to envelope.


Step 3: Using an Airbrush add BV11


Step 4: Add Y06


Step 5: Then add B02


Step 6: Add RV06


Step 7: Finally add BG05 to cover any remaining white areas.


Step 8: Lay star stencil over envelope and spritz with Colorless Blender, allow to dry.


Step 9: Draw design onto Mask It film (if drawing your own design make sure to
REVERSE it so your design turns out the correct way), cut out and apply to envelope.
Paint over envelope with black gesso or acrylic paint.


Step 10: Allow paint to dry for approximately 2 minutes and then carefully remove mask.
You will notice there are a few areas that need a little smoothing or filling in.


Step 11:  Use Copic Multi Liners and Spica pens to fill in gaps, decorate and address envelope.


Once all the edges are smoothed and a little extra colour added, your unique mail art envelope is complete and will look something like this.


I'd love to see if you create any mail art with your Copic markers, please share your art on the Copic Australia Facebook page.

Back with more soon,
Kate

Pin It

Wednesday, January 7, 2015

Copic Mixed Media Journal Page

Today I will be using a few supplies from my X-Press It and Copic hoard to create a bright and happy journal page, using my 'word' for the new year!  


You will need:
  • Copic Markers: N9, N7, N5, N3, RV06, RV09, RV69 & Blender '0'
  • Copic Airbrush System
  • Copic Opaque White Paint
  • AtYou Spica Pens: Turquoise & Lavender
  • Molotow Paint Marker: Signal White EF, Shock Blue, Currant & Skin Pastel
  • X-Press It Mask It 
  • FabScraps Stencil - DS003
  • Bruynzeel Aquarel Pencils (watercolour pencils)
  • Assorted Stamps


Here's how I made it.


Gather a bold stencil, I used a pretty flower stencil from FabScraps, some favourite Copic Multi Liners for outlining and X-Press It Blending card or Blending Journal.  Using pale grey, print the word Bloom onto your page or card (for more lettering tips have a look here) using a printer.

Trace over the outline of the word with Black 0.5 Copic Multi Liner.


Place the stencil/mask at the top right corner of the page, using scrap paper to protect the rest of the area.  Use an airbrush to add RV06 all over the stencilled image.

 Swap to a darker colour, RV09 and add colour the the outside three rows of petals.

For the final colour select something even darker, I used RV69 and add colour to the outside row of petals only.

Repeat these steps, until the entire page is covered with stencilled flowers.

Use the Molotow white paint marker and Copic Opaque white to colour the printed word.
Outline letters using N9, N7, N5, N3, the greys will create a subtle outline.

At this stage you will have something a bit like this, you could leave it there,
but I had to add a little extra.

Using Memento Tuxedo Black stamp a few images onto the page (roughly mask the word with Mask It before stamping).  Use Bruynzeel Aquarel pencils to add a hint of green to the stamped leaves and black to create a shadow around the figure.  Blend with a waterbrush and let  dry.

 For a little extra pop use a Molotow paint markers to colour the skin, and also as a wash (mixed with water on a palette) to add a hint of colour to the wings.
For some sparkle add a touch of Spica - or a LOT.

Finish by adding a hint of white to the wings and leaves for contrast.

The end result looks like this - I love how the original stencil pattern recedes or pops forward depending on the placement against the stamp!


So grab those Copics and your favourite stamps and stencils and have a play!

Wishing you all a wonderful 2015 - Happy New Year!

Kate

Pin It

Wednesday, December 10, 2014

Easy Typography for your Copic Projects

Today I'm going to let you in on a little secret - my lettering isn't always what I'd like it to be, so I CHEAT.  So in an effort to help all those other typographically challenged people out there, I'm going to share my secret formula for creating beautiful lettering on your cards, journals or scrapbook pages.

Two reliable ways to create beautiful typography:
  1. Use Word (or similar program) to create desired lettering, choose a outline only font, print this in very light grey using a laser printer.  You can trace straight over this printed word with Copics and if you are neat, no one will ever know you didn't write this yourself!
    NB: test your printer ink to make sure it is Copic safe before trying this, all laser printers are Copic Safe, only some ink jet printers have Copic safe ink.  For information on how to test your ink read this post.
  2. You learned this second method in Elementary/Primary School.  Print the word onto paper, flip the paper over and scribble on the back very heavily in soft lead pencil (eg: 2B), turn the paper back over place it over your project and then trace over the word - this transfers the carbon/graphite from the pencil creating a copy onto your card or page.
    NB: Only one thing you need to know here, tracing over pencil with Copic makes the pencil permanent - you can't rub it out later!  So this works best if outlining with black or dark coloured Copics that will hide the pencil lines.


I used the pencil trace method for the lettering on this project, as I knew I would be using black, which would hide the pencil lines.


For today's project, I will be printing directly onto my X-Press It Blending card and tracing over the printed text.


What I Used:

  • Copic Multi Liners: 0.3 Black, Turquoise, Pink, BS Cool Gray (Brush Tip)
  • Copic Marker: RV09, BG32 & BG49
  • AtYou Spica: Turquoise & Pink
  • XPress It Blending Card
  • Font - Victorian LET

Begin by tracing over your printed outline with a black Copic Multi Liner - I used 0.3

Using your favourite coloured Copic Multi Liners add a little doodling, I started with Turquoise.

Then add a little pink, leaving quite a bit of white space.

Swap to some of those yummy sparkly Spica pens and add a little more doodling.

Finish by adding simple dots to fill the remaining white space - don't make all of your marks doodles, keep some marks simple so your design doesn't look too busy.

To make your design pop off the page,  edge your letters using a cool grey - I used the Copic Brush Tip Multi Liner for this as it has a wondeful precision tip.

To complete my card I needed some ribbon, sadly I didn't have a colour to match the Turquoise, so Copics to the rescue!  I coloured some white ric-rac with my Copic Marker BG32.

I had the same problem with the glitter on my tree, so once again I used my Copic Markers in RV09 & BG49 to recolour the glitter elements on my embellishment.

When you put it all together the finished Christmas card looks like this.


I hope this post has given you a few ideas about how you could incorporate Copics into your Christmas cards and create beautiful lettering on your Copic projects!

Back with more next year and wishing you all a very Merry Christmas!
Kate
Pin It