Showing posts with label Tutorial. Show all posts

Wednesday, September 9, 2015

Spring Has Sprung

Spring is here and with the warmer weather come buds and flowers as the gardens start to bloom with colour!  Today's tutorial looks at pink Spring flowers and how different pink combinations can create different looks for your paper projects.

Materials 
  • X-press It Blending Card
  • Copic Markers
  • Memento Tuxedo Black Ink
  • Power Poppy Springtime Love Stamp Set


Step 1 - Stamp image in Memento Ink onto X-press It Blending Card. Colour the rose in RV000.


Step 2 - Add the mid-tone colour of RV52


Step 3 - Add the darkest colour, RV55, where the shadows would be. With flowers, this usually occurs at the base of the petals or where the petals fold over and therefore block the light source.


Step 4 - Lightly blend the colours using the next lightest colour, leaving areas for highlights. Colour the rest of the image in preferred colours.


Step 5 - This image is coloured exactly the same except for the pink rose.  The colours for this flower are RV10, RV13, RV14


Step 6 - Once again, this image is coloured the same, except the rose is coloured with RV00, RV32, RV34


Step 7 - In this example, the rose is coloured with RV91, RV93, RV95.  The higher the first number is on your copic marker, the more desaturated (or grey) your colour becomes.


The other colours used for today's examples are -
Long Leaves - YG11, YG13, YG17, YG67
Rose Leaves - YG61, YG63, YG67, G99
Bluebells and Ribbon - B60, B63, B66

Hope today tickles you PINK!Pin It

Wednesday, August 26, 2015

Copic Various Inks

Goodmorning Copic fans, today we are looking at Copic Various Inks.  Various Ink refills are part of what make the Copic system truly amazing. All 358 marker colors have a matching bottle of ink. Each bottle will fill a dry marker up to 15 times, depending on the style of marker. Each bottle of ink has a built in dropper tip for simple application. The airtight inner seal prevents the alcohol ink from drying out for many years.  Now while it's true their intended purpose is to refill your markers (Kathy discussed this in the last post),  they are an amazing art supply all by themselves, incredibly versatile and perfect for creating alcohol ink based art projects.  Today we are looking at using Copic Various inks in 2 different ways, allowing you to incorporate more inky fun into your cards, pages, canvas or scrapbooking layouts.

22176-6130-3ww-l


Materials


  • Copic Various Inks: V15, BV04, RV19, V06, R35, RV32, Y38, YR04 & YG01
  • Copic Colorless Blender
  • Copic Multi Liner in 0.3 & 0.5
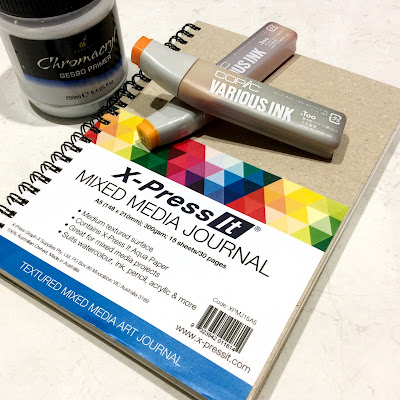
  • X-Press It Mixed Media Journal
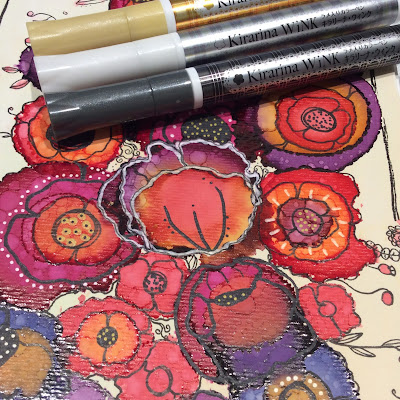
  • Kirarina Wink Pens - Precious Set 
  • Chromacryl Gesso
  • Paint Palette, brush & mister


Instructions

Step 1
Begin by preparing a page in your X-Press It Mixed Media Journal with gesso.  If you would like a white background paint the page with white gesso, if you would like a coloured background, then add a few drops of Various Ink to your gesso to create a tint.  Wait for the gesso to dry before moving to step 2.  Painting the page with gesso seals the paper and will allow the Various ink to move around more.  This example uses YG01 and Y38 to tint the gesso.


Step 2
Add one drop of Various Ink onto your background, because the paper has been sealed, the ink will spread and wick forming a circular shape.  This example uses R35 as the first colour.  For larger circles add a second or even a third drop of ink.  One drop goes quite a long way.


Step 3
To create some variation add a single drop of Various Ink - Colorless Blender to the center of each circle.  This will create a paler area in the middle.


Step 4
To create a more interesting looking circle add a single drop of a different colour to the center.  This example uses Y38.  You may notice that a single drop of any colour travels almost the same distance over the gesso!


Step 5
To create smaller circles, add 3 drops of colour and 2 drops of Colorless blender to a plastic surface, mix together and apply using an old paint brush.  Adding a smaller amount of liquid/ink results in a smaller circle!  You can use the brush to create smaller flowers, flower centers or add little drops of colour to the background.

Repeat Steps 2-5 using a variety of Copic Various Ink colours, until you have almost covered your background.  This example uses: V15, BV04, RV19, V06, R35, RV32, Y38 & YR04

Step 6
Add a little Various Ink - Colorless Blender to a small mister and lightly spray the Colorless Blender from a distance of about 15cm over your circles - this will create random spots and create pattern and interest.

Step 7
Use black Copic Multi Liners 0.3 & 0.5 to add a doodled designs and embellish your circles.  I made my circles look like flowers by adding lines to resemble petals.


Step 8
Use Kirarina Wink pens from the Precious Metals set to add touches of pearl and metal to your design - once dry you can draw over the ink with your Copic Multi Liners for extra detail.  I love how these look over the Copic Various Inks - it really brings the page to life.


This is some of the ink pattern and doodling up close - the Various Inks give the most amazing concentrated colour to your projects.


and the finished project looks like this, a little wild and chaotic, but so much fun to create.


So grab your Various Inks and use them on your next project - they're not just great for refilling your markers, but are fabulous all on their own.

Back with more next month,

KatePin It

Wednesday, August 12, 2015

Refilling Your Markers

If you look after your tools, they will look after you - today we are looking at refilling our Copic Markers!  An easy way to check that your Copic Markers need refilling is when they squeak a lot when colouring or the nib starts going white when you colour and the colour on the page is patchy and uneven. There is a Various Ink refill for every colour in the Copic range (358) so you never need to buy the same colour marker again, simply refill using one of the three methods below. 

TIP - The Various Ink refills can refill your markers (without overfilling) - about 10-12 for Sketch, 15 for Ciao, 8 for Copic and 5-7 for Wide.

There are CC notches on the side of the Various Ink Refills - each mark is one CC.  To refill a Ciao add 1 to 1.5 cc's ink.... Sketch 2 cc's.....Copic 2-3 cc's......Wide 3-4 cc 

Materials
Copic Various Ink
Copic Marker
Copic Tweezers
Copic Booster Needle

 
Method 1 - Drib and Dab
Step 1 - Make sure the numbers on your Various Ink Refill and Marker match. 
Step 2 - Remove the lids of your marker, tip it on a slight angle and add a drop at a time from your refill.  Make sure the previous drop has absorbed into the marker before adding the next.

TIP - You remove both lids so you can see if the marker is overfilled as the excess ink will come out the other end.


Method 2 - Remove Nib and Fill
Step 1 - Remove the nib of you marker - always remove the chisel nib!  Take the Copic Tweezers by placing the teeth low down on the nib and carefully pull out.

TIP - you should never remove the Super Brush nib unless you are planning on replacing as it is more easily damaged.


Step 2 - Once the nib is removed, place the refill bottle directly into the marker and squeeze slightly.  The ink with drip out the end when filled completely.


Method 3 - Booster Needle
Step 1 - Screw the Booster Needle onto the Various Ink Refill.
Step 2 - Put Needle into the marker until you feel resistance. Squeeze to fill.

TIP - It is very important that you clean the Booster Needle after each use to remove any excess coloured ink.  Any remaining ink will contaminate the next marker you refill.  Place the Booster Needle in a container with some rubbing alcohol or Blender Solution to rinse or screw the needle onto a bottle of Colourless Blender and squeeze until the solution flows clear.

There is a PDF flyer available in the Copic Library that can be downloaded and printer for later reference.  You can find that file HERE.


Pin It

Wednesday, July 15, 2015

Testing Papers for Blending

When colouring with Copic Markers, it is important to consider which type of paper to use.  Just as the type of ink can make an impact on your project, so too can paper. You can colour on different types of paper, however you will get vastly different results so it's always good to test your papers before you work on your final project.


Materials
Copic Markers
Copic Multiliner
X-press It Blending Card
Computer Paper
Glossy Photo Paper
Vellum


Step 1 - Testing X-press It Blending Card
Draw a circle with Copic Multiliner and colour in B00 (or the lighter of two blending colours). A good paper should not have any colour moving outside of the lines.


Step 2 - Testing X-press It Blending Card
Flick B02 inwards from one side of the circle (or the darker of two blending colours)


Step 3 - Testing X-press It Blending Card
Where the two colours meet, lightly blend with B00 (or the lighter of two blending colours). A good paper should allow the colours to blend easily together.


Step 4 - Testing X-press It Blending Card
Place the chisel end of the Colourless Blender (0) in the centre of your circle for a few seconds. The result should be a rectangular shape that shows that the colour is moving and look lighter than its surrounds.


Step 5 - Testing Vellum
Vellum is a non-absorbent paper, the colours will look much lighter when applied. The colours will also lift off when changing colours so be careful and scribble excess colour off your nibs. The Colourless Blender will completely remove the colour underneath rather than move the colour.


Step 6 - Testing Glossy Photo Paper
Glossy Photo Paper is also non-absorbent, although the colours look darker than on vellum. Colours will not blend as well as an absorbent paper and the Colourless Blender does not work very effectively.


Step 7 - Testing Computer Paper
Computer Paper is a thin absorbent paper and after laying down the colours, you may find ink seeping outside the lines as this paper oversoaks quickly. Use a lighter hand when colouring on Computer Paper.


Pin It

Wednesday, June 17, 2015

Testing Inks

When creating a project with Copic, one of the most important things to consider is the type of ink you use for your line work. Because there are so many ink formulations, it is always a good idea to test your ink before you commit to using it on a project.


Materials
Copic Marker
Copic Multiliner
Ballpoint Pen
Memento Ink
StazOn Ink
X-press It Blending Card
Step 1 - Testing Copic Multiliners:
Draw a line with a Copic Multiliner onto X-press It Blending Card and place a light coloured Copic Marker next to, but not on, the line.
Step 2 - Testing Copic Multiliners:
Over soak the paper and make the Copic ink move over the line drawn with a Multiliner. A good ink, like the Copic Multiliner will not move or bleed.

Step 3 - Testing Ball Point Pens:
Repeat the first two steps using a bad ink, such as a ballpoint pen, will move when using the testing ink steps as outlined above.
Step 4 - Testing Memento Ink: 
When stamping, or using another ink type, use the same procedure. Stamp the image, place the Copic Marker next to, but not on the line and oversoak the paper. Memento Ink as used in this picture will not move and therefore is a good ink to use with Copic Markers.

Stamped Image by Power Poppy
Step 5 Testing Stayzon Ink: 
Stamp an image in Stazon Ink and oversoak the paper following the above steps. This will result in the ink moving. StazOn Ink is a solvent ink and is not suitable to use with Copic Markers as they are alcohol ink.

Stamped Image by Power Poppy.
Post by Kathy Jones

Pin It

Tuesday, May 5, 2015

Going Green!


Hello Everyone!! Today's tutorial is looking at greens - in particular colouring leaves! Anyone who has followed my work would know how much I love colouring floral images, so of course leaves are an essential piece of this. So let's have a look and see how today's image came together......

Start by stamping your image - I've used Simply Camellias by Power Poppy - in Memento Tuxedo Black onto X-press It Blending Card.

In the Copic family there is a huge selection of greens to choose!  Whether you want soft spring greens, deep greens, bold and bright greens or muted grey-greens, you will find a great combination to suit your project.  Today I've used what would probably be my favourite green combination - G40, G43, G46, G99.  I just love the hues of this combo!

Lay down the base colour of G40.....


Then add some detail using the next darkest colour, in this case G43, particularly along the veins of the leaves......

Deepen the shadow areas with G46 (make sure you get on the underside of the leaves that would be blocked from the light)......

Go back with your next lightest colour (G43) and flick out from where you've added the G46.....

Then lightly go back with G40 (your lightest colour) over the edges of your previously coloured parts.  You don't have to colour over the entire leaf, the parts that you leave will stay light which will give you more contrast and interest.  You can repeat these last two steps until you are happy with the result.

When you blend with your lighter colours, you sometimes loose the depth from your darkest colour, so go back to add the contrast - I like to use G99 to really add some interest.

Then to make your leaves look a little less 'perfect' add a touch of E21 to parts of the leaves (it doesn't have to be much).  I really like the effect this gives.

Finish colouring your image in your preferred colours!!

I've used......
Flower - R00, R11, R12, R14, Y17
Bowl - C1, B0000, B000
Leaves - G40, G43, G46, G99, E21

Create your card!  You can find more details about how I made the card itself on my blog.

Hope you've enjoyed today's tutorial and you're inspired to colour some beautiful foliage yourself!!
Happy colouring
Kathy

Pin It