Wednesday, February 23, 2011
Challenge #8 - A Little Magic
When thinking of a challenge this month I was thinking of St Patrick's Day but then I thought, I'm going to see WICKED tomorrow night - why settle for only leprechauns in green when you could have fairies, witches, dragons, unicorns and more!!! So use your Copics to add a little Magic to your project, and even better some Spica for a bit of sparkle!!!
What's the Challenge?: Create a project (card, layout, off the page) using your Copic Markers to create something with a little MAGIC!!
Is there a Prize?: YES!! Get EXCITED - it's a 12 pack of the BRAND NEW SKETCH COLOURS!!!! You'll find out more about this awesome prize next Wednesday here on the blog!!!!
Who can play?: Sorry, only Australian residents are eligible to win this prize - but everyone is welcome to play along with us!!
How do you enter?: Use the inlinkz below to connect to your blog or online gallery and upload it prior to 6pm Monday 28th March, Australian EST (4am USA EST)!!!
We can't wait to see what you create!!!
Hugs
Kathy :)
Pin It
Tuesday, February 22, 2011
And The Winner Is.....
Thank you so much to all the people who joined us to SHARE THE LOVE!!! And WOW there really was so much love being shared!!!!
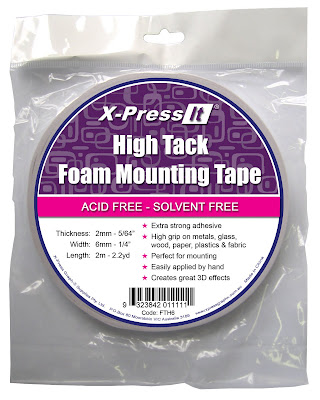
Well done....you have won 10 sheet pack of blending card AND a pack of the NEW X-Press It 6mm High Tack Foam Tape.

Be sure to check back here tomorrow for Kathy's Challenge.
Also just a quick reminder- We will be running Copic Classes at the From Picture to Page Show on Saturday March 19, 2011. Visit the Copic Website for more information and to register.
Happy colouring....Mandi xxx
Wednesday, February 16, 2011
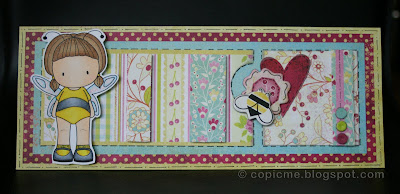
Bee Mine!

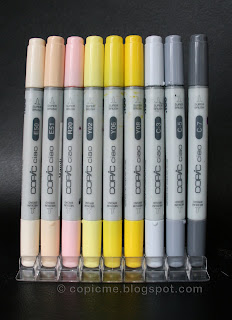
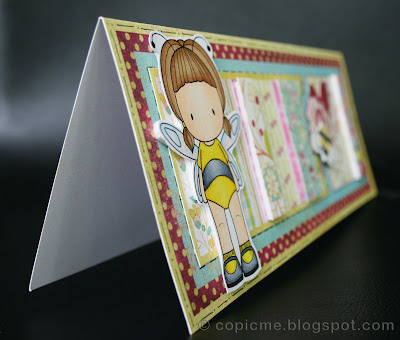
I have used this gorgeous CC Design lil bug emma stamp on X-Press It Blending Card. I used the following colours to blend and ofcourse finished off with lots of clear Spica in her wings and gold Spica in her hair!

In the original image of Emma she doesn't have the black bee stripe across her belly. I used my multiliner to add in the stripe as I wanted her to look more like a bee, rather than a beautiful butterfly or fairy!
The interesting thing about creating a black effect with Copics is that you don't need to use black at all. I find if I do use black (100) it is very flat and you can't show any definition in the shading. Whereas if you use a combination of grey, you will be able to get a good shaded black area. So.... to colour the "black" stripe on Emma's belly I used C-1, C-3, C-5 and C-7. This is my favourite combination for black!
I still colour using my lightest colour first and then gradually work in the other greys, until I create the illusion of black!
I used Basic Grey's gorgeous Lemonade cardstock to put this card together and X-Press It foam tape to raise the image and a few of the panels!

There is a little bit of time to still enter your project in our challenge. So don't miss out! Enter HERE now!!!!
xxx
Pin It
Wednesday, February 9, 2011
And the Winner is....
We are thrilled to announce the winner is.........
- Linda Gooch said...
- Copic Markers are my newest, most favourite thing. Since I was a little girl Ive LOVED colouring in. To me Copic markers are pens for grownups and help me to rediscover, with delight, that inner uninhibited child artist.Oooh yeah!!!
Please email Sascha@xpressgraphx.com.au with your postal details so we can send your prize to you!!!
If you entered the Blog Candy competition to win 10 Sheets of X-press It Blending Card on Kathy's Blog, you can find the winner announcement at Inspired to Stamp! :)
Now as we all know, the states of Victoria and Queensland have been devastated by floods at the beginning of this year and due to those events some of the Certification and Project Classes have been rescheduled. The new dates for Melbourne and Brisbane classes are....
Melbourne:
Saturday 5th March – Copic Standard/Beginner Certification
Sunday 6th March – Copic Project Class
Monday 28th March – Intermediate Certification
Brisbane:
Saturday 16th April - Copic Standard/Beginner Certification
Sunday 17th April - Copic Project Class
Happy Colouring!
Kathy Pin It
Wednesday, February 2, 2011
Coloring White
 In my two samples above (floral images from JustRite Stampers' Beautiful Day stamp set, both stamped with Tsukineko Memento Tuxedo Black ink on fabulous X-Press It Blending Card!), I've used two different ways to color objects white, using Copic markers. The first method is to start with a very pale (quad 0) marker color as your base coat on the flowers and then add the deeper shades of color to the centers of the flowers. Here, I used R0000, R81, R83 and R85 to make these lilies resemble my favorite Star Gazers:
 (Greens used were YG03 & YG17). You can also use the Colorless Blender marker to remove color from the outer edges of the flowers, to make them appear even whiter. But I find starting with the R0000 gives a better, less streaky blend than the Colorless Blender:
 The second method is to add shading to your white object -- after all, even white things have shadows to them, just like colors do! Shading will make the white of your object "pop" and appear even whiter!
  In my second example above, I used C1 and C3 to shade the flowers:
If I hadn't added any shading to the white flowers, this is what they would have looked like:

Another tip to coloring white things is to place as much color around the white object(s) as possible -- this will give more life to your project. As you can see in my second example, there are a lot of greens around the white flowers (YG03, YG17, YG63), the pink bow (R81, R83, R85), and I airbrushed the background of the image with Copic Y32. All these things draw your eye to the white flowers and make them the center of attention!
Many thanks to the Copic Oz team for asking me stop by today . . . I hope you enjoyed the tutorial! ~ Sharon


