Showing posts with label Kate. Show all posts

Wednesday, August 26, 2015

Copic Various Inks

Goodmorning Copic fans, today we are looking at Copic Various Inks.  Various Ink refills are part of what make the Copic system truly amazing. All 358 marker colors have a matching bottle of ink. Each bottle will fill a dry marker up to 15 times, depending on the style of marker. Each bottle of ink has a built in dropper tip for simple application. The airtight inner seal prevents the alcohol ink from drying out for many years.  Now while it's true their intended purpose is to refill your markers (Kathy discussed this in the last post),  they are an amazing art supply all by themselves, incredibly versatile and perfect for creating alcohol ink based art projects.  Today we are looking at using Copic Various inks in 2 different ways, allowing you to incorporate more inky fun into your cards, pages, canvas or scrapbooking layouts.

22176-6130-3ww-l


Materials


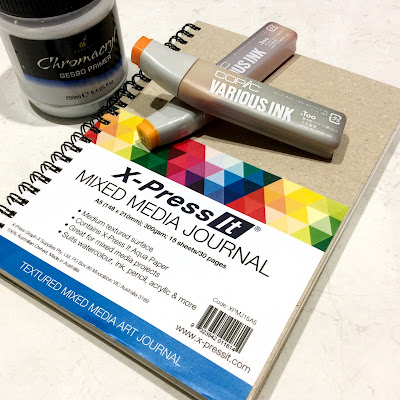
  • Copic Various Inks: V15, BV04, RV19, V06, R35, RV32, Y38, YR04 & YG01
  • Copic Colorless Blender
  • Copic Multi Liner in 0.3 & 0.5
  • X-Press It Mixed Media Journal
  • Kirarina Wink Pens - Precious Set 
  • Chromacryl Gesso
  • Paint Palette, brush & mister


Instructions

Step 1
Begin by preparing a page in your X-Press It Mixed Media Journal with gesso.  If you would like a white background paint the page with white gesso, if you would like a coloured background, then add a few drops of Various Ink to your gesso to create a tint.  Wait for the gesso to dry before moving to step 2.  Painting the page with gesso seals the paper and will allow the Various ink to move around more.  This example uses YG01 and Y38 to tint the gesso.


Step 2
Add one drop of Various Ink onto your background, because the paper has been sealed, the ink will spread and wick forming a circular shape.  This example uses R35 as the first colour.  For larger circles add a second or even a third drop of ink.  One drop goes quite a long way.


Step 3
To create some variation add a single drop of Various Ink - Colorless Blender to the center of each circle.  This will create a paler area in the middle.


Step 4
To create a more interesting looking circle add a single drop of a different colour to the center.  This example uses Y38.  You may notice that a single drop of any colour travels almost the same distance over the gesso!


Step 5
To create smaller circles, add 3 drops of colour and 2 drops of Colorless blender to a plastic surface, mix together and apply using an old paint brush.  Adding a smaller amount of liquid/ink results in a smaller circle!  You can use the brush to create smaller flowers, flower centers or add little drops of colour to the background.

Repeat Steps 2-5 using a variety of Copic Various Ink colours, until you have almost covered your background.  This example uses: V15, BV04, RV19, V06, R35, RV32, Y38 & YR04

Step 6
Add a little Various Ink - Colorless Blender to a small mister and lightly spray the Colorless Blender from a distance of about 15cm over your circles - this will create random spots and create pattern and interest.

Step 7
Use black Copic Multi Liners 0.3 & 0.5 to add a doodled designs and embellish your circles.  I made my circles look like flowers by adding lines to resemble petals.


Step 8
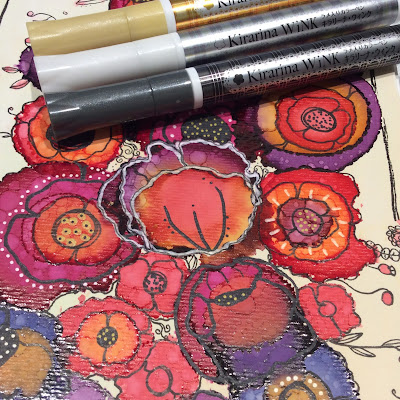
Use Kirarina Wink pens from the Precious Metals set to add touches of pearl and metal to your design - once dry you can draw over the ink with your Copic Multi Liners for extra detail.  I love how these look over the Copic Various Inks - it really brings the page to life.


This is some of the ink pattern and doodling up close - the Various Inks give the most amazing concentrated colour to your projects.


and the finished project looks like this, a little wild and chaotic, but so much fun to create.


So grab your Various Inks and use them on your next project - they're not just great for refilling your markers, but are fabulous all on their own.

Back with more next month,

KatePin It

Monday, June 1, 2015

The Copic Airbrush System

Today we are looking at the Copic Airbrush system or ABS for short.  The Copic ABS (Airbrush System) allows you to use your Copic Sketch or Original markers in new and exciting ways and provides an easy and relatively inexpensive way take your Copic art to the next level!

Materials:


The Copic ABS is extremely simple to use, just attach the Airgrip to the Aircan (or compressor), insert the chisel tip of your Copic Original or Sketch marker into the Airgrip and press the trigger to deliver a steady and even colour across porous or non-porous surfaces!  To change colours just swap one marker for another.  Why do you need an ABS or compressor - well to create beautiful even backgrounds, graded colours, amazing blends and it actually uses LESS ink than normal colouring!


If you are new to airbrushing then Copic has several starter kits available, ABS1-N, ABS-2, ABS-3 - more information is available on the Copic ABS flyer.  I'd recommend the COPIC Marker Airbrush Kit #1 – as this versatile kit includes: Airgrip, Air Can 180 (about 45 mins of air time),  Air Adapter, Air hose, and a handy can holder. Everything you need to create airbrush art with your COPIC markers! This  kit also has everything you need if you decide you LOVE airbrushing and want to upgrade to an air compressor in the future (which is why I'd recommend this particular kit). Though you will need to make sure your new compressor comes with a hose, as the air hose included in this kit isn't suitable.

1_53677_FS


Here are a few quick exercises to help you better use your new Copic ABS system, whether you are using an Aircan or a compressor.


Make sure your marker nib is not pushed too far in or too far out.


Spray Close to the Card 3-4cm - from left to right quickly, fast = light


Spray Close to the Card  3-4cm - from left to right slowly, slow = darker


Spray At a Distance (15cm) from the Card = a finer spray


The trigger is pressure sensitive and will create different effects according to the pressure used.

Give it a try - press trigger down 1/2 way = lighter colour


press all the way down = darker colour


The ABS is pure magic when used with Stencils or Masks.  I've created this using  X-Press Graph-X Stencil Sheets (these have an adhesive backing so give a super crisp result).  Spray your ink from a distance, moving slowly back and forth over the card to achieve a smooth and even result.


HOT TIPS:
  1. Airbrushing uses LESS ink than direct colouring since saturating the paper isn't necessary.
  2. Don't shake or lay aircans on their side while in use.
  3. If your aircan gets too cold (happens after about 90 seconds spraying) then your spray may become splotchy or the airflow may be reduced.  Just wait for a minute or so, until your air can warms back up!
  4. Begin by starting with a light spray.......... you can always add more colour, but you can't take it off
  5. If your project begins to feel tacky you have added too much ink (this will happen more quickly on non-porous surfaces).  To combat the tacky feeling, carefully spray your project with a fixative - make sure it's non-alcohol based or the fixative will react with your Copic ink!
  6. Ensure your marker is aligned vertically with the nozzle - if it's off to one-side or the other your spray pattern will be off.
Have fun using your Copic ABS system, though fair warning it's rather addictive!

Back next month with more,
Kate

Pin It

Wednesday, April 15, 2015

Copic Coloured Feathers

Hi Copic fans - today I thought I'd try something fun and funky - colouring feathers with my Copic Markers!  As it turns out the most difficult thing about this was finding the white feathers - as for the colouring the feathers, it was so much easier than I thought it would be and rather a lot of fun.


Gather beautiful supplies, I used:

  • Copic Markers: RV17, V09, B16, V17, BG13, BG57 & BG75
  • Kirarina Wink Pens: Candy Set
  • Molotow One4All Paint Pen EF 2mm nib
  • X-Press It Double Sided Tape
  • FabScraps Starburst Sprays: Tea Pot Purple & Time Travel Teal
  • White Feathers
  • X-Press It Blending Card A4
  • Ink Pads: Archival Royal Purple, Aquamarine and Delicata - Golden Glitz


Begin by cutting some of the X-Press It Double Sided Tape to size and trim the ends to fit the feathers, stick a piece of tape onto the back of each feather.  This provides a little extra strength and stops the feather splitting as you work on it.


Using a variety of Copic Marker Colours, carefully colour each feather - I varied my feather colours but used the same process on each.


Begin by adding BG13 - use the Copic Marker to create a chevron pattern.  Try to work in the direction of the feather - it's much easier!


Add some V09.


Use BG57 to begin smoothing out the colours by adding this colour between and over some of the previous colouring.


Finish colouring with BG75 - you can leave some white space if you like.


Once the feathers are coloured to your satisfaction, it's time to add some metallic glitz with the fabulous Kirarina Wink pens and Molotow paint markers - I added dots, stripes and even coloured some of the tips on my feathers.


To create a background for the feathers, stamp some text on the bottom of your white cardstock - I used purple and aqua inks with a little Delicata Golden Glitz over the top. 


Add a few splashes or drips of Starburst sprays and dry with a heat gun/embossing tool.


Remove the backing from double sided adhesive tape on your feathers and press carefully and firmly onto your card front.  Your finished card should look a little something like this.


I can think of all sorts of uses for these Copic coloured feathers now that I've finished this - I think I might make myself a pair of earrings next!

Back soon with more,
Kate

Pin It
Wednesday, March 18, 2015

Mail Art Made Easy with Copics

Hello gorgeous Copic Oz fans, today I'm going to show you how to create a beautiful piece of mail art that's almost too pretty to send!  This is a great way to create custom envelopes and really impress your postie, plus it's a simple way to reuse some of your own art to make something new.  If you don't want to make your own, there are an amazing array of beautiful stencils and masks on the market these days and this technique is versatile enough to look amazing with most of them.


You Will Need:

  • Copic markers:  Y06, BV11, B02, BG05 & RV06
  • Copic Various Ink: Colorless Blender
  • Copic Multi Liners: 0.3 & 0.5
  • AtYou Spica: Turquoise, Clear and Pink
  • Fab Scraps Stencil: Stars
  • X-Press It: Blending Card and Mask It film
  • Mini Mister bottle filled with Colorless Blender
  • Black acrylic paint or gesso


Instructions

You can watch this being created on our YouTube channel or follow the instructions below.


Step 1: Gather some bright colour Copic markers, your favourite paper and Mask It film.
Fold card to create envelope.


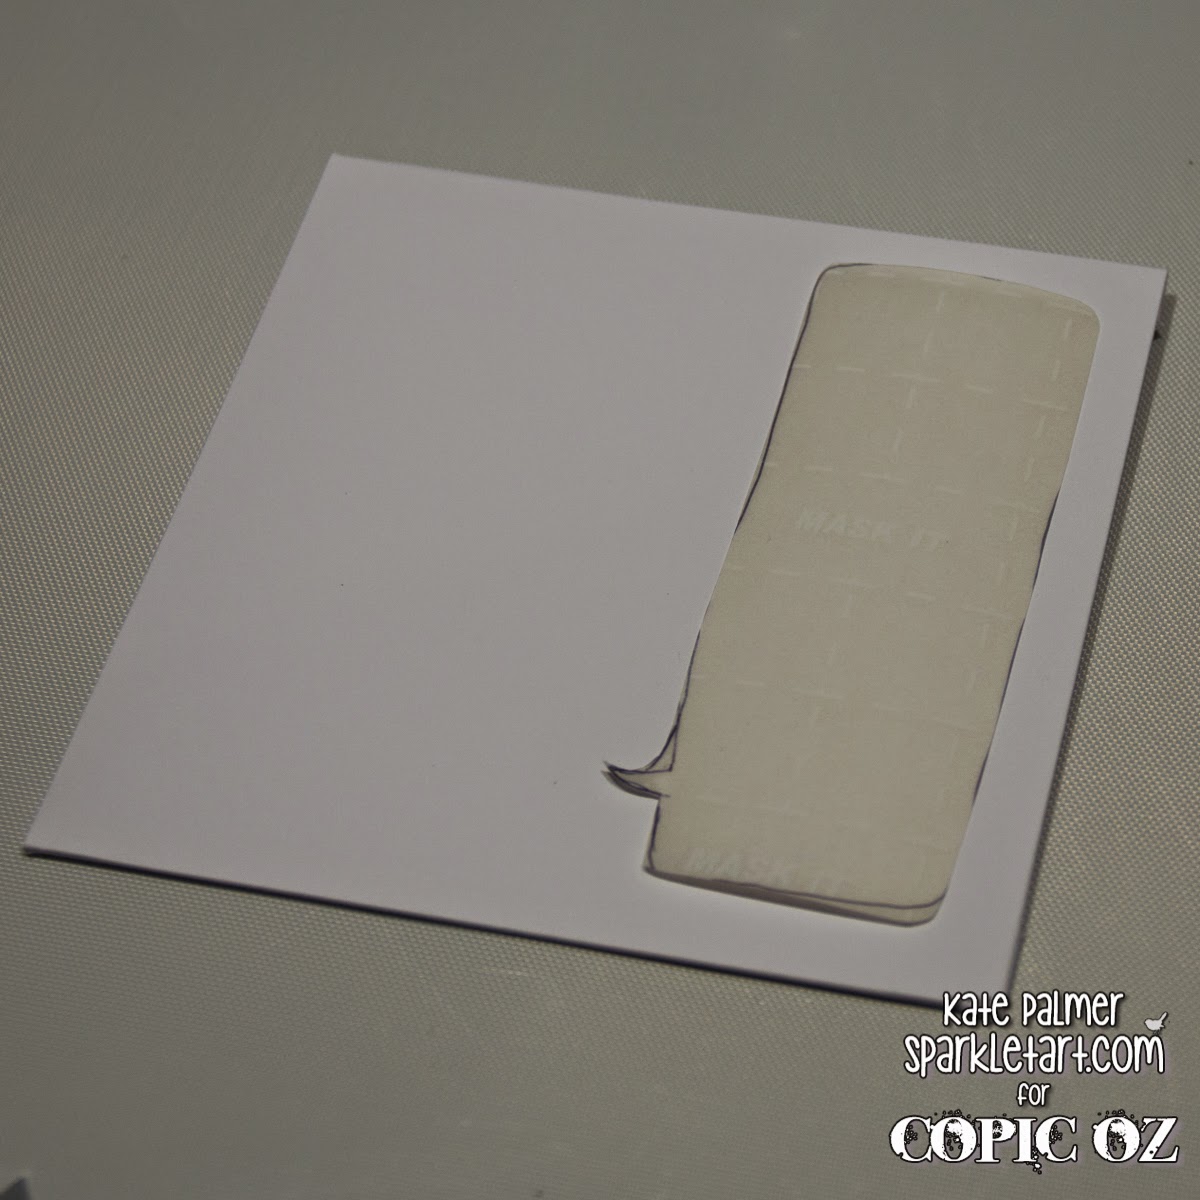
Step 2: Cut a speech bubble shape out of Mask It film and adhere to envelope.


Step 3: Using an Airbrush add BV11


Step 4: Add Y06


Step 5: Then add B02


Step 6: Add RV06


Step 7: Finally add BG05 to cover any remaining white areas.


Step 8: Lay star stencil over envelope and spritz with Colorless Blender, allow to dry.


Step 9: Draw design onto Mask It film (if drawing your own design make sure to
REVERSE it so your design turns out the correct way), cut out and apply to envelope.
Paint over envelope with black gesso or acrylic paint.


Step 10: Allow paint to dry for approximately 2 minutes and then carefully remove mask.
You will notice there are a few areas that need a little smoothing or filling in.


Step 11:  Use Copic Multi Liners and Spica pens to fill in gaps, decorate and address envelope.


Once all the edges are smoothed and a little extra colour added, your unique mail art envelope is complete and will look something like this.


I'd love to see if you create any mail art with your Copic markers, please share your art on the Copic Australia Facebook page.

Back with more soon,
Kate

Pin It

Wednesday, February 4, 2015

Monotone Journal Page - ALL Copics

Today I'm going to use my Copic products to create a monotone journal page.  Working with a limited colour palette was a new thing for me and monotones even more so!  I used my Copics to add custom colour to my embellishments and create a custom background for my page.  It took me a while to decide on an idea, but once I had, I have to confess the Copics pretty much made this so simple I was practically cheating!


You Will Need:

  • Copic Products
    Various Inks: Colorless Blender '0', E25, E59 & Black 100
    Copic Markers: Black 100, E18, E25, E47 & E59
  • X-Press It Products
    Mixed Media Journal, Double Sided Tape, Adhesive Sheets, Clear Gel Glue
  • FabScraps Products
    12x12 Paper - Australia, Journal Inserts - Love and Travel, Chipboard Die Cut - Lamps, Stencil - Stars & Vintage Mist
  • Chromacryl: Gesso Primer & Texture Paste
  • Collage items eg: ribbon, lace, leaves, material, metal findings, photos or papers

Custom Background

Step 1: Cut 12x12 paper down to a size that will fit into X-Press It Mixed Media Journal (do not glue in until finished).  Glue on Love and Travel Journal Insert pieces to add texture.  Apply a thin layer of gesso - you should still be able to see patterns from the paper underneath.  


Step 2: Apply texture paste through stencil to add more interest, wait for the paste to dry completely.  

Step 3: Copic Various Inks to Tint Gesso - Mix Various Ink (E25) into some gesso to create a tint and brush over page.  Wait until gesso is dry.

Step 4: Copic Various Inks as a Glaze - Mix Various Ink  (E59) into glazing fluid and brush over page, allow to sit for one minute then wipe off with a baby wipe.  This will allow the glaze to settle into the texture and create a grungy look.

Once dry, see how the glaze really highlights the texture!

Step 5:  Use Copic Markers ( Black 100, E25, E47 & E59) to outline elements, 

edge the page and scribble over texture.  
NB: After repeated use in this way (contact with paint and use on rough surfaces)
you will need to replace the nib on your marker.


Step 6: Fill mister with Copic Colorless Blender ('0') and spritz over the page - this will make the colours you applied run and bleed.  Allow page to dry completely,

 Once dry you can add stamping, stencilling, mists, anything you like. 


Custom Colour Embellishments

Using the same Copic colours on your embellishments as used on the background, will create a beautifully coordinated page.

Step 1: Gather all of the embellishments you will use to decorate your page, these can be metal, wood, chipboard, plastic etc. Colour the embellishments roughly with your Copic Markers (Black 100, E18, E25, E47 & E59) - leave some uncoloured space.  

Step 2: Make a pile and randomly drip on various ink (E59, E25 & 100).

Step 3: Spritz with Colorless Blender and leave to dry.


The Finishing Touch

Put it all together and glue your embellishments onto your background using Clear Gel Glue.  


You can see how the same colours of Copic ink look slightly different depending on
the material they were applied to.

I love that no matter the material - fabric, metal or chipboard, everything looks so fantastic and was so easy to colour.


My finished page looks like this... aren't those Copic colours gorgeous!


I hope this has given you some new ideas about how to use your Copic products!  Don't forget, use over paints or rough surfaces will deteriorate your nibs - so have some replacements on hand, or a few special Copic markers that you use for 'naughty' things only! 

KatePin It