Showing posts with label Mandi. Show all posts

Wednesday, September 14, 2011

Casting a Shadow

Adding a cast shadow can be a bit tricky at first but its not as difficult as it seems.  

In the image below, you'll notice that one side of the shape is light and the other is darkened. All you need to know for now or keep in mind is just that. What the light doesn't hit,  is darkened.  

You also have to ask yourself where is the light source coming from and how far away is it? 
It is important to keep in mind that shadows are crisper and darker if the light source is close to the object or lighter and more diffused the further away the light source is.

In the image below you can see a very slight cast shadow.  This would indicate the light source is far away from the girl and rather diffused.

Whereas in the image below there is a very distinct cast/drop shadow
 Here is a nifty trick to help you place your cast shadow.
Create a mask of your image using Mask It.
Determine your light source, and then place your mask in the correct position.

You can then draw around your mask and shade in your cast/drop shadow appropriately. It is important to note the shadow takes on the shape of the item it comes from.
.
Now you have a go!

** Please Note: All shadows in this post have been darkened considerably for clearer understanding of the concept! 

Happy Cast Shadowing .... Mandi-Lee


Pin It

Wednesday, July 13, 2011

Colouring Hair with Texture

Hi Everyone,

As you know I love colouring cute little people, and I often get asked how I go about colouring hair.

So, I have put together this tutorial with a video! ( My first video - EVER!!!!) for you to hopefully enjoy and learn from!

As Copic addicts, when we first learn to colour we often use the Basic Blending rules that we know to colour hair. That is, colour in circles and aim for a 'seamless blend'. The outcome often looks like this ...

As you can see the hair is very smooth, but also very bland!!!

If you colour a little differently, you can add some texture and 'streak-i-ness' to make the hair look much more interesting...like the image below!

Here is a closer look at the difference between the two colouring styles:

So, without further adieu, here is my video tutorial on how to Colour Hair with Texture!
(pssst let me know what you think!)


Happy Colouring...Mandi-Lee

PS Don't forget to enter the challenge!!!!!
Pin It

Wednesday, June 22, 2011

A Brilliant Brisbane Show

Hi Everyone,

WOW! Have we been busy! The Copic Team hit the Brisbane Convention and Exhibition Centre for the Scrapbook and Papercraft Expo. We had a brilliant few days at the show.


Our Copic Stand was constantly full of beautiful people watching us demo how to colour with the Copic Markers.


We ran two fabulous Copic Classes (for beginners) each day. Thank you to all who attended our classes. Kathy and I had a lot of fun and enjoyed teaching all the lovely ladies and gentlemen that are new ....and not so new ... to Copic.

We covered concepts like; how to do basic blending, picking your colours and palette blending.

In my class we looked at feather blending, colouring black and white, picking your light source.... and a few other secret Copic tricks!


Take a look at what we made ...


We look forward to seeing you next year where we intend to offer our first ever intermediate level copic classes at a show...so stay tuned and keep colouring.


Also don't forget to enter our CopicOz Challenge!

Happy Colouring...Mandi-Lee

Pin It

Wednesday, May 25, 2011

Challenge #11 - Colour Challenge

Welcome to this months Copic Oz Challenge!


This month we are having a COLOUR CHALLENGE!

Below you will find details for TWO SEPARATE colour challenges!
BOTH CHALLENGES ARE USING THE SAME COLOURS!!!!

The colours for BOTH challenges are

CHALLENGE 1: COPIC OZ MONTHLY CHALLENGE


What's the Challenge?:
Create a project (card, tag, layout, off the page) using the above Copic Markers (BV00, G82, RV21)! If you dont have these exact colours... don't worry...you can use any markers as close to this as you have!!!

Is there a Prize?: YES!! This month's awesome prize is a pack of A4 X-press It Blending Card and a Copic Swatch Book!!!

Who can play?: The challenge is open to EVERYONE, including international!!!

How do you enter?: Use the inlinkz (at the end of the post) to connect to your blog or online gallery and upload it prior to 6pm Monday 27th June 2011, Australian EST (4am USA EST)!!!


SEPARATE TO THE ABOVE MONTHLY CHALLENGE....


CHALLENGE 2: AUSTRALIA'S COPIC CARD CHALLENGE


Australia’s Copic Card Challenge is on again!

The prize pack is Worth $450!!!! .... AMAZING....but you have to be super quick, as entries for Australia’s Copic Card Challenge close on the 3rd June 2011!

Winner to be announced at Brisbane Scrapbooking and Papercraft Convention.

If you would like to enter the Australia’s Copic Card Challenge you need to MAIL your actual card to:

Copic Card Challenge
P.O.Box 80
Moorabbin VIC 3189

CLICK HERE for more information about
Australia’s Copic Card Challenge including entry form and terms and conditions. Please read terms and conditions of entry as they are different to the monthly challenge!!!!!


Pin It

Wednesday, February 16, 2011

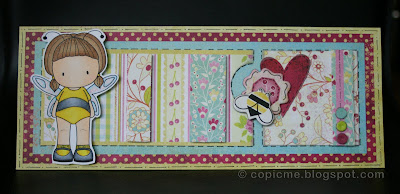
Bee Mine!

I wanted to remind you all to enter this months challenge, "Share the Love" and I also wanted to talk briefly about colouring black.


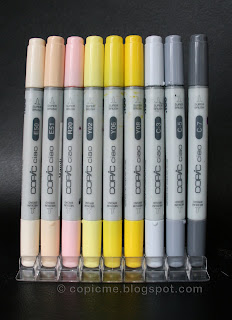
I have used this gorgeous CC Design lil bug emma stamp on X-Press It Blending Card. I used the following colours to blend and ofcourse finished off with lots of clear Spica in her wings and gold Spica in her hair!


In the original image of Emma she doesn't have the black bee stripe across her belly. I used my multiliner to add in the stripe as I wanted her to look more like a bee, rather than a beautiful butterfly or fairy!

TIP:
The interesting thing about creating a black effect with Copics is that you don't need to use black at all. I find if I do use black (100) it is very flat and you can't show any definition in the shading. Whereas if you use a combination of grey, you will be able to get a good shaded black area. So.... to colour the "black" stripe on Emma's belly I used C-1, C-3, C-5 and C-7. This is my favourite combination for black!

I still colour using my lightest colour first and then gradually work in the other greys, until I create the illusion of black!


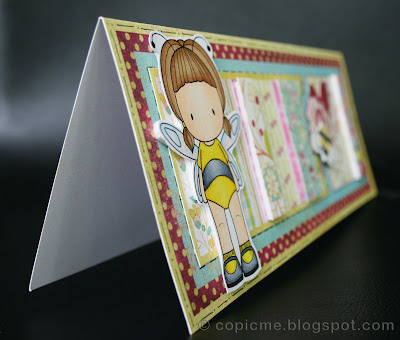
I used Basic Grey's gorgeous Lemonade cardstock to put this card together and X-Press It foam tape to raise the image and a few of the panels!


There is a little bit of time to still enter your project in our challenge. So don't miss out! Enter HERE now!!!!

Happy Colouring....Mandi
xxx


Pin It

Wednesday, January 19, 2011

Refilling your Markers

The beginning of the new year is always a good time to check through your Copic collection and check which of your markers are running a little dry and need to be refilled.
The best way to check your markers is to test both ends of the marker. If you see streaks when you use the chisel point, or if the brush end is looking white and blotchy you need to refill your marker.
HANDY TIP: Generally, without overfilling you can get about 10-12 refills for Sketch, about 15 for Ciao, about 8 for Copic, and 5-7 for Wide.
METHODS OF REFILLING
There are a couple methods for refilling Copic markers. Find the technique that works best for you.
METHOD 1: Drip and dab
This is the most direct method of refilling. Using the dropper built into the ink bottle simply drip/dab drops of ink onto the chisel nib of your marker. Let each drop get sucked in before you add the next drop. This is a simple method but is slow, as it takes a few minutes to completely refill a marker.
METHOD 2: Remove Nib and Fill
With your Copic tweezers pull the chisel tip out from your marker. Carefully set your tip onto a protected surface. Check where the ink level is in your bottle before you start filling.
Take the cap off the other side of the marker as this helps to avoid getting air bubbles and allows the ink to seep in better.
Carefully insert the tip of the refill bottle into the marker and gently pour in the ink. Try not to squeeze too quickly as it's easy to overfill the marker. When you're done, put the nib back in and put both caps back on. Let your marker sit for a moment so the ink evenly distributes within the marker.
METHOD 3: Refilling with the Booster Needle
Using the Copic Booster Needle is the most accurate and quickest way to refill markers. The Booster Needle is a large needle that attaches over the built-in dropper on a bottle of ink. Then, you insert this into the marker and squeeze gently until you've added enough ink.
An ORIGINAL marker has a little gap between the chisel nib and the plastic barrel. The booster needle fits down into that gap and easily fills the marker. As the needle enters the marker you will feel some slight resistance- this is where it is meeting the sponge reservoir inside. You don't need to jam the needle all the way until it stops, just until you feel the slight resistance.

With the SKETCH or CIAO markers you will need to remove the chisel nib (NOT the Brush!) to refill with the booster. Push the booster in until you feel some resistance, then gently squeeze until you've added the correct amount for your marker type. Replace the caps and nibs on your marker and let it sit for a while to allow the ink to soak out to the edges. Be very careful with this method as you are working with a VERY large and VERY sharp needle....that also needs to be stored away immediately after use, so no one gets hurt.
Cleaning out the booster needle
You don't need a different needle for each marker that you refill, but you do need to clean out the needle really well between using different colours. An easy way to clean the needle is to put it into a small container and add a little rubbing alcohol to rinse it in. Another easy way to clean it is to screw the needle onto the top of the colourless blender bottle and squirt it through the needle until the colourless blender solution flows clear.
GENERAL RULES WHEN REFILLING MARKERS:
*Work over a protected surface.
*Make sure your refill colour matches the marker.
*Keep a bottle of hand-sanitizer or colourless blender solution and some paper towels for clean up.
HANDY TIP: Ciao add 1 to 1.5 cc's ink.... Sketch- 2 cc's.....Copic 2-3 cc's......Wide 3-4 cc's
*Each little mark on the side of a bottle of ink is 1 cc.
Remember, you can download the refilling guide from the Copic Marker Library here as well.
I hope this post helps you to refill your markers....and you now have fresh and juicy markers that are ready for lots of happy colouring!!!
Mandi
Pin It

Tuesday, November 30, 2010

Skin Colour and EXCITING DATES FOR 2011!!!

Skin Colour Combinations is amongst the most asked questions I get as a Regional Instructor. As you know I looove colouring these gorgeous little people, and so skin colour is very important!

I have made this sample page for you to have a look at! It includes skin colour combinations from very light skin colour to dark skin tones. Please click on the image to enlarge the page!

When I colour skin I always start with my lightest colour first then pay particular attention to where my light sourse is coming from, so that I know where to add my darker colours. I then always go back to my original lightest colour to blend out my skin. I almost always finish off the face with a tough of R20 to add some blush to the cheeks!

Here is another sample of a gorgeous CC Design person that I have coloured using a lighter skin colour combination!

This project is part of a whole Copic Party Theme which has just been published! You can see the whole 7 page Copic Party in this months issue of Simply Cards Magazine!!!!


WE HAVE RELEASED DATES FOR CERTIFICATION AND THE NEW COPIC PROJECT PROGRAM FOR 2011!!!

We are excited to announce that dates for Copic Certification and the Copic Project Program have been released for early 2011. Additional dates (including dates for Intermediate Certification) will be released next year so keep checking www.copicoz.blogspot.com
For more information about the Copic Project Class see: http://copicmarker.com.au/certification/
Brisbane:
Monday 21 February - Copic Project Class – taught by Kathy
Sydney:
Saturday 12 March – Copic Beginner/Standard Certification – taught by Mandi
Sunday 13 March – Copic Project Class – taught by Mandi
Melbourne:
Saturday 26 February - Copic Project Class – taught by Mandi
Saturday 5 March – Copic Beginner/Standard Certification – taught by Mandi


Happy Colouring....Mandi xxx


Pin It

Tuesday, November 23, 2010

Skin Colour and NEW Challenge #5

NOW FOR THE NEW CHALLENGE!!!!

The new challenge for this month is "CHRISTMAS WITH A TWIST!"

You need to create a project with a Christmas theme....with an added twist! Now the twist may be an off the page project, or perhaps a card using nontraditional Christmas colours, or perhaps a twisted Christmas stamp! I will leave the twist part up to you! However, please make sure that this is still a COPIC based project!

Here is my little twisted sample!

Is there a Prize?: YES!! This month it's a Copic Swatch Book and a Mist It Spray!!!


Who can play?: This challenge is open to EVERYONE, including international!

How do you enter?: Use the inlinkz below to connect to your blog or online gallery and upload it prior to 6pm Monday 27th December 2010, Australian EST (4am USA EST)!!! The winner will be announced on Tuesday 28th December 2010!!!!

Good Luck...and Happy Colouring!!!
Mandi


Pin It

Tuesday, November 2, 2010

Intermediate Certification and an EXCITING ANNOUNCEMENT!

Hi Everyone,

Well I am back .... I had a great trip to Chicago – where I met up with Marianne and the rest of the amazing Copic Team.


(Debbie Olson, Lori Craig, Marianne Walker, Sherrie Siemns, Bianca NDM, Sharon Harnist, Jenn Balcer, Me, Jennie Black and Colleen Schaan)


I completed the Intermediate Certification with Marianne .... and now can’t wait to teach the Intermediate Certification Program in Australia in 2011.

Intermediate certification will be a fantastic 1 day program covering colour theory, light and shade and much more. More details will be posted in 2011 - please keep checking copicoz.blogspot.com
I am also so excited to announce....
In addition to intermediate certification we will be launching the inaugural Copic Project Course. This will be a one day program, focusing on 3 amazing Copic projects. This will be an amazing opportunity to create 3 completed Copic projects, covering a range of mediums and incorporating a variety of techniques.
More information and upcoming dates and locations will be posted in 2011.
Mandi-Lee
xxx
Pin It

Wednesday, October 6, 2010

Understanding Light Source

There are so many beautiful images out there to stamp or print and colour using Copics! One of the biggest questions people have once they are ready to colour is "How do I know where my light source is coming from?".
It is quite important to understand the answer to this question, as it will help you to know where to apply your lightest colours an where to apply your darkest colours for shadows.
Here is a little bit of ART THEORY!
Light and shadows visually define objects. Before you can colour the light and shadows you see, you need to train your eyes to visually identify the following:
  • Light source: The direction from which a dominant light originates. The placement of this light source affects every aspect of an image.
  • Shadows: The areas on an object that receive little or no light.

In the above examples I have indicated where my light source (sun) is coming from.

We are looking to see where the rays of sunlight first hit the image. This is where the image will be lightest, and where you will use your lightest Copic colours. Adversely where the rays are farthest from the sun is where the darkest areas or shadows will fall. This is where you will use your darker Copic colours.

For many people it is easier to identify the light source if you physically draw it. The best way to do this is to draw a sun and its rays onto piece of acetate and lay it over your image.

Now once you can identify where your light is coming from, you can start adding colour to your image.


In the above example you can see how this theory translates into practice once the colour is added.

I hope this makes identifying and understanding where your light source is coming from a little easier! ....

I have used CC Designs Goth Girl to remind you to enter the Copic Oz Halloween Challenge.
Happy Colouring....Mandi xxx
Pin It

Tuesday, September 28, 2010

And The Winner Is.....

Thank you so much to all the very creative people out there who entered the Copic Oz Card for a Man Challenge!

I was absolutely blown away by the talent out there! It was such a hard decision choosing just one card as the winner of the challenge!

So without any further adieu, the winner is ......

#26 Mel B
Mel this card is so clever! Your little image is just so cute and your colouring is great! Well done to you!!!! Please email me your address to copicoz@optusnet.com.au so thet we can get your amazing prize to you!

The prize for this challenge is the 12 pack of Spica Pens! What a great prize!!!!The other cards that we loved, and thought deserved an honorable mention are:

#9 Andrea
and #8 Kirsty T
There were many others that we loved!

So thank you again for entering the challenge, and please check back tomorrow for the start of Deb's Challenge!!!

Happy Colouring .... Mandi
xxx
Pin It

Wednesday, August 25, 2010

Challenge # 2: It's All About Men!

Father's Day is coming up in Australia, and I thought it would be a great idea to celebrate the men in our lives for the next COPICOZ challenge!

Here is the card I made! Hopefully it inspires you all to create your own project!


What's the Challenge?: Create a project (card, layout, off the page) using your Copic Markers to colour A FATHER'S DAY CARD OR A MASCULINE CARD FOR A MAN!You can use any colours or images you like to create your masterpiece!

So lets celebrate the men in our lives - and let your imagination run wild!!!
Is there a Prize?: YES!! X-press Graph-X are donating a wonderful prize of a pack of 12 ATYOU SPICA PENS!!!! ( You all know how much I looooove these pens!!!)

Who can play?: This challenge is open to EVERYONE, including international!

How do you enter?: Use the inlinkz below to connect to your blog or online gallery and upload it prior to 6pm Monday 27th September, Australian EST (4am USA EST)!!! Winner will be announced on the COPICOZ blog on TUESDAY 28th SEPTEMBER 2010.

Come play along with me! I can't wait to see what you create!

Happy Colouring!....Mandi
xxx

Pin It

Tuesday, August 10, 2010

X-Press It Blending Card

People often tell me that when they apply too much ink during the blending process the ink starts to feather out beyond the stamped line. The first question I ask them is, "What paper are you using?"

If you are using the wrong type of paper with your Copics, you are going to get very frustrated with the outcome!


Here is an example of a teddy bear that I stamped using Neenah Cardstock, and as you can see the browns have moved and made a mess of the image. I also couldn't get a smooth blend and as such would have needed to keep adding a lot more ink to achieve a blend that I am happy with.


Here is another example using Pinks. Again I have marked the area where the Copics have feathered out of the image. I am definitely NOT happy with this quality of work!


The paper that I use ALL the time is X-Press It Blending Card. This paper has been available for some time in Australia, but has just been released at CHA in America. This paper is taking the Copic World by storm! If you have not yet used it ... RUN ... as fast as you can to your Copic stockist, and pick up a pack for yourself! I am no longer frustrated with the outcome of my work. Instead I love the Copic Colours as they are bright and vibrant on this paper. As you can see in the example below, I am able to achieve a brilliantly smooth blend between my colours, but most importantly the ink stays where it is meant to be. I am able to use a lot of ink to really saturate the fibers of the paper and still my colours wont feather out!


Don't forget to enter Kathy's Flower Challenge. You still have time to create something remarkable. This is such a fun challenge .... and the prize is great too!!!

You can also join me at Paperific on the (27th, 28th and 29th August) for a 2 Hour Colouring with Copic Class. Click Here for more information or to book your spot!

Happy Colouring....Mandi xxx


Pin It