Wednesday, August 26, 2015

Copic Various Inks

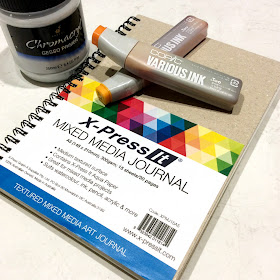
Goodmorning Copic fans, today we are looking at Copic Various Inks.  Various Ink refills are part of what make the Copic system truly amazing. All 358 marker colors have a matching bottle of ink. Each bottle will fill a dry marker up to 15 times, depending on the style of marker. Each bottle of ink has a built in dropper tip for simple application. The airtight inner seal prevents the alcohol ink from drying out for many years.  Now while it's true their intended purpose is to refill your markers (Kathy discussed this in the last post),  they are an amazing art supply all by themselves, incredibly versatile and perfect for creating alcohol ink based art projects.  Today we are looking at using Copic Various inks in 2 different ways, allowing you to incorporate more inky fun into your cards, pages, canvas or scrapbooking layouts.

22176-6130-3ww-l


Materials


  • Copic Various Inks: V15, BV04, RV19, V06, R35, RV32, Y38, YR04 & YG01
  • Copic Colorless Blender
  • Copic Multi Liner in 0.3 & 0.5
  • X-Press It Mixed Media Journal
  • Kirarina Wink Pens - Precious Set 
  • Chromacryl Gesso
  • Paint Palette, brush & mister


Instructions

Step 1
Begin by preparing a page in your X-Press It Mixed Media Journal with gesso.  If you would like a white background paint the page with white gesso, if you would like a coloured background, then add a few drops of Various Ink to your gesso to create a tint.  Wait for the gesso to dry before moving to step 2.  Painting the page with gesso seals the paper and will allow the Various ink to move around more.  This example uses YG01 and Y38 to tint the gesso.


Step 2
Add one drop of Various Ink onto your background, because the paper has been sealed, the ink will spread and wick forming a circular shape.  This example uses R35 as the first colour.  For larger circles add a second or even a third drop of ink.  One drop goes quite a long way.


Step 3
To create some variation add a single drop of Various Ink - Colorless Blender to the center of each circle.  This will create a paler area in the middle.


Step 4
To create a more interesting looking circle add a single drop of a different colour to the center.  This example uses Y38.  You may notice that a single drop of any colour travels almost the same distance over the gesso!


Step 5
To create smaller circles, add 3 drops of colour and 2 drops of Colorless blender to a plastic surface, mix together and apply using an old paint brush.  Adding a smaller amount of liquid/ink results in a smaller circle!  You can use the brush to create smaller flowers, flower centers or add little drops of colour to the background.

Repeat Steps 2-5 using a variety of Copic Various Ink colours, until you have almost covered your background.  This example uses: V15, BV04, RV19, V06, R35, RV32, Y38 & YR04

Step 6
Add a little Various Ink - Colorless Blender to a small mister and lightly spray the Colorless Blender from a distance of about 15cm over your circles - this will create random spots and create pattern and interest.

Step 7
Use black Copic Multi Liners 0.3 & 0.5 to add a doodled designs and embellish your circles.  I made my circles look like flowers by adding lines to resemble petals.


Step 8
Use Kirarina Wink pens from the Precious Metals set to add touches of pearl and metal to your design - once dry you can draw over the ink with your Copic Multi Liners for extra detail.  I love how these look over the Copic Various Inks - it really brings the page to life.


This is some of the ink pattern and doodling up close - the Various Inks give the most amazing concentrated colour to your projects.


and the finished project looks like this, a little wild and chaotic, but so much fun to create.


So grab your Various Inks and use them on your next project - they're not just great for refilling your markers, but are fabulous all on their own.

Back with more next month,

Kate

Wednesday, August 19, 2015

Copic Colourless Blender

Today we are looking at the little miracle that is the Copic Colourless Blender.  In spite of the name, the Colourless Blender isn't really used for blending, instead think of it as your magic wand!  It can fix mistakes, create patterns and texture and add highlights to your colouring.  Today we will be looking at the most common uses for your Colourless Blender.
To try out the following techniques you will need:
  • Copic Colourless Blender
  • Copic Various Ink - Blending Fluid
  • Assortment of Copic Markers
  • Variety of textured materials
  Materials sm

Fixing Mistakes
The Colourless Blender is made to correct mistakes, it contains an alcohol-based fluid that with careful application will fade and in most cases completely remove small areas of Copic Ink, though strong colours are notoriously difficult to completely erase.  To test different colours, create a dark area of colour (this circle is YG09), then using the chisel nib of your Copic Colourless Blender 'push' the ink back towards the black line.  Apply one layer of blending ink and wait for it to dry, before applying more layers.
  Textures 2 sm aThere are about 5 layers of Copic Colourless Blender applied to this area, you can see it's almost gone.

Textures 2 sm a
Creating Dots
All you need to create a fantastic spotted pattern is the brush tip of your Colourless Blender.  Colour your image, this circle is coloured with R37 - then press and hold the brush nib for about 2 seconds on the coloured surface.  For more pronounced dots either hold for a longer period, or go back over previously created dots.
  Textures 10
Creating Bricks
To create a brick pattern all you need is the chisel end of your Colourless Blender. Colour your image, this circle is coloured with BG49 - then press and hold the chisel nib for about 2 seconds on the coloured surface, repeat to create a brick pattern. For a more pronounced pattern either hold for a longer period, or go back over previously created marks.
Textures 6 sm

Creating Fur
To create the texture of fur use a washcloth or a piece of velvet.  Colour your image, this circle is coloured with E59, add some of the Colourless Blender to a mini misting bottle and spray onto the fabric.  The material should be damp - not wet.  Press the material to your coloured image.  You should notice the pattern appearing almost instantly.  If you have missed any areas or want a more pronounced pattern - repeat the above process.
Textures 9 sm
Create Clothing Texture
To create fabulous clothing textures a piece of hessian, denim or lace is perfect.
To create this pattern coloured image using BV08 and then spritz a piece of hessian with Colourless Blending Fluid, press the damp material onto your coloured image.
  Textures 8 sm

To create this material pattern colour your image using RV09, then spritz a piece of denim with the Colourless Blending Fluid, and press the denim onto the coloured shape.  The denim used was quite fine (like on a denim shirt)  if a thicker denim had been used, like jeans denim, then the pattern may have been more pronounced.
Textures 7 sm

To create this lace pattern, colour your image with YG09, then spritz lace with Copic Colourless Blending Fluid - press the lace onto your coloured image and hold for a few seconds.
Textures 4 sm copyHighlights
To create a highlight colour image using Y35 then using the brush nib of the Copic Colorless Blender draw your highlight.  Add a layer of Colourless Blender and allow it to dry so you can see the actual depth of colour removal.  You may need to go over the area 3 or 4 times to achieve the level of colour removal that you want.
Textures 11

More more information on creating texture with the Copic Colourless Blender, have a look at these past posts:
I hope this gives you a few more ideas about how to use your Copic Colourless Blender,

Back with more soon,
Kate

Wednesday, August 12, 2015

Refilling Your Markers

If you look after your tools, they will look after you - today we are looking at refilling our Copic Markers!  An easy way to check that your Copic Markers need refilling is when they squeak a lot when colouring or the nib starts going white when you colour and the colour on the page is patchy and uneven. There is a Various Ink refill for every colour in the Copic range (358) so you never need to buy the same colour marker again, simply refill using one of the three methods below. 

TIP - The Various Ink refills can refill your markers (without overfilling) - about 10-12 for Sketch, 15 for Ciao, 8 for Copic and 5-7 for Wide.

There are CC notches on the side of the Various Ink Refills - each mark is one CC.  To refill a Ciao add 1 to 1.5 cc's ink.... Sketch 2 cc's.....Copic 2-3 cc's......Wide 3-4 cc 

Materials
Copic Various Ink
Copic Marker
Copic Tweezers
Copic Booster Needle

 
Method 1 - Drib and Dab
Step 1 - Make sure the numbers on your Various Ink Refill and Marker match. 
Step 2 - Remove the lids of your marker, tip it on a slight angle and add a drop at a time from your refill.  Make sure the previous drop has absorbed into the marker before adding the next.

TIP - You remove both lids so you can see if the marker is overfilled as the excess ink will come out the other end.


Method 2 - Remove Nib and Fill
Step 1 - Remove the nib of you marker - always remove the chisel nib!  Take the Copic Tweezers by placing the teeth low down on the nib and carefully pull out.

TIP - you should never remove the Super Brush nib unless you are planning on replacing as it is more easily damaged.


Step 2 - Once the nib is removed, place the refill bottle directly into the marker and squeeze slightly.  The ink with drip out the end when filled completely.


Method 3 - Booster Needle
Step 1 - Screw the Booster Needle onto the Various Ink Refill.
Step 2 - Put Needle into the marker until you feel resistance. Squeeze to fill.

TIP - It is very important that you clean the Booster Needle after each use to remove any excess coloured ink.  Any remaining ink will contaminate the next marker you refill.  Place the Booster Needle in a container with some rubbing alcohol or Blender Solution to rinse or screw the needle onto a bottle of Colourless Blender and squeeze until the solution flows clear.

There is a PDF flyer available in the Copic Library that can be downloaded and printer for later reference.  You can find that file HERE.